
How to create a cloud phone
Audience: anyone who has signed up, or is about to. Console: https://www.ccloudphone.com/my Read first: What is a cloud phone
Five steps from nothing to a running phone: create an account → have an instance seat → have a SOCKS5 proxy → create the phone → power it on.
1. Create an account
Open https://www.ccloudphone.com/my. If you are not signed in you land on the sign-in page; click Sign up at the bottom.
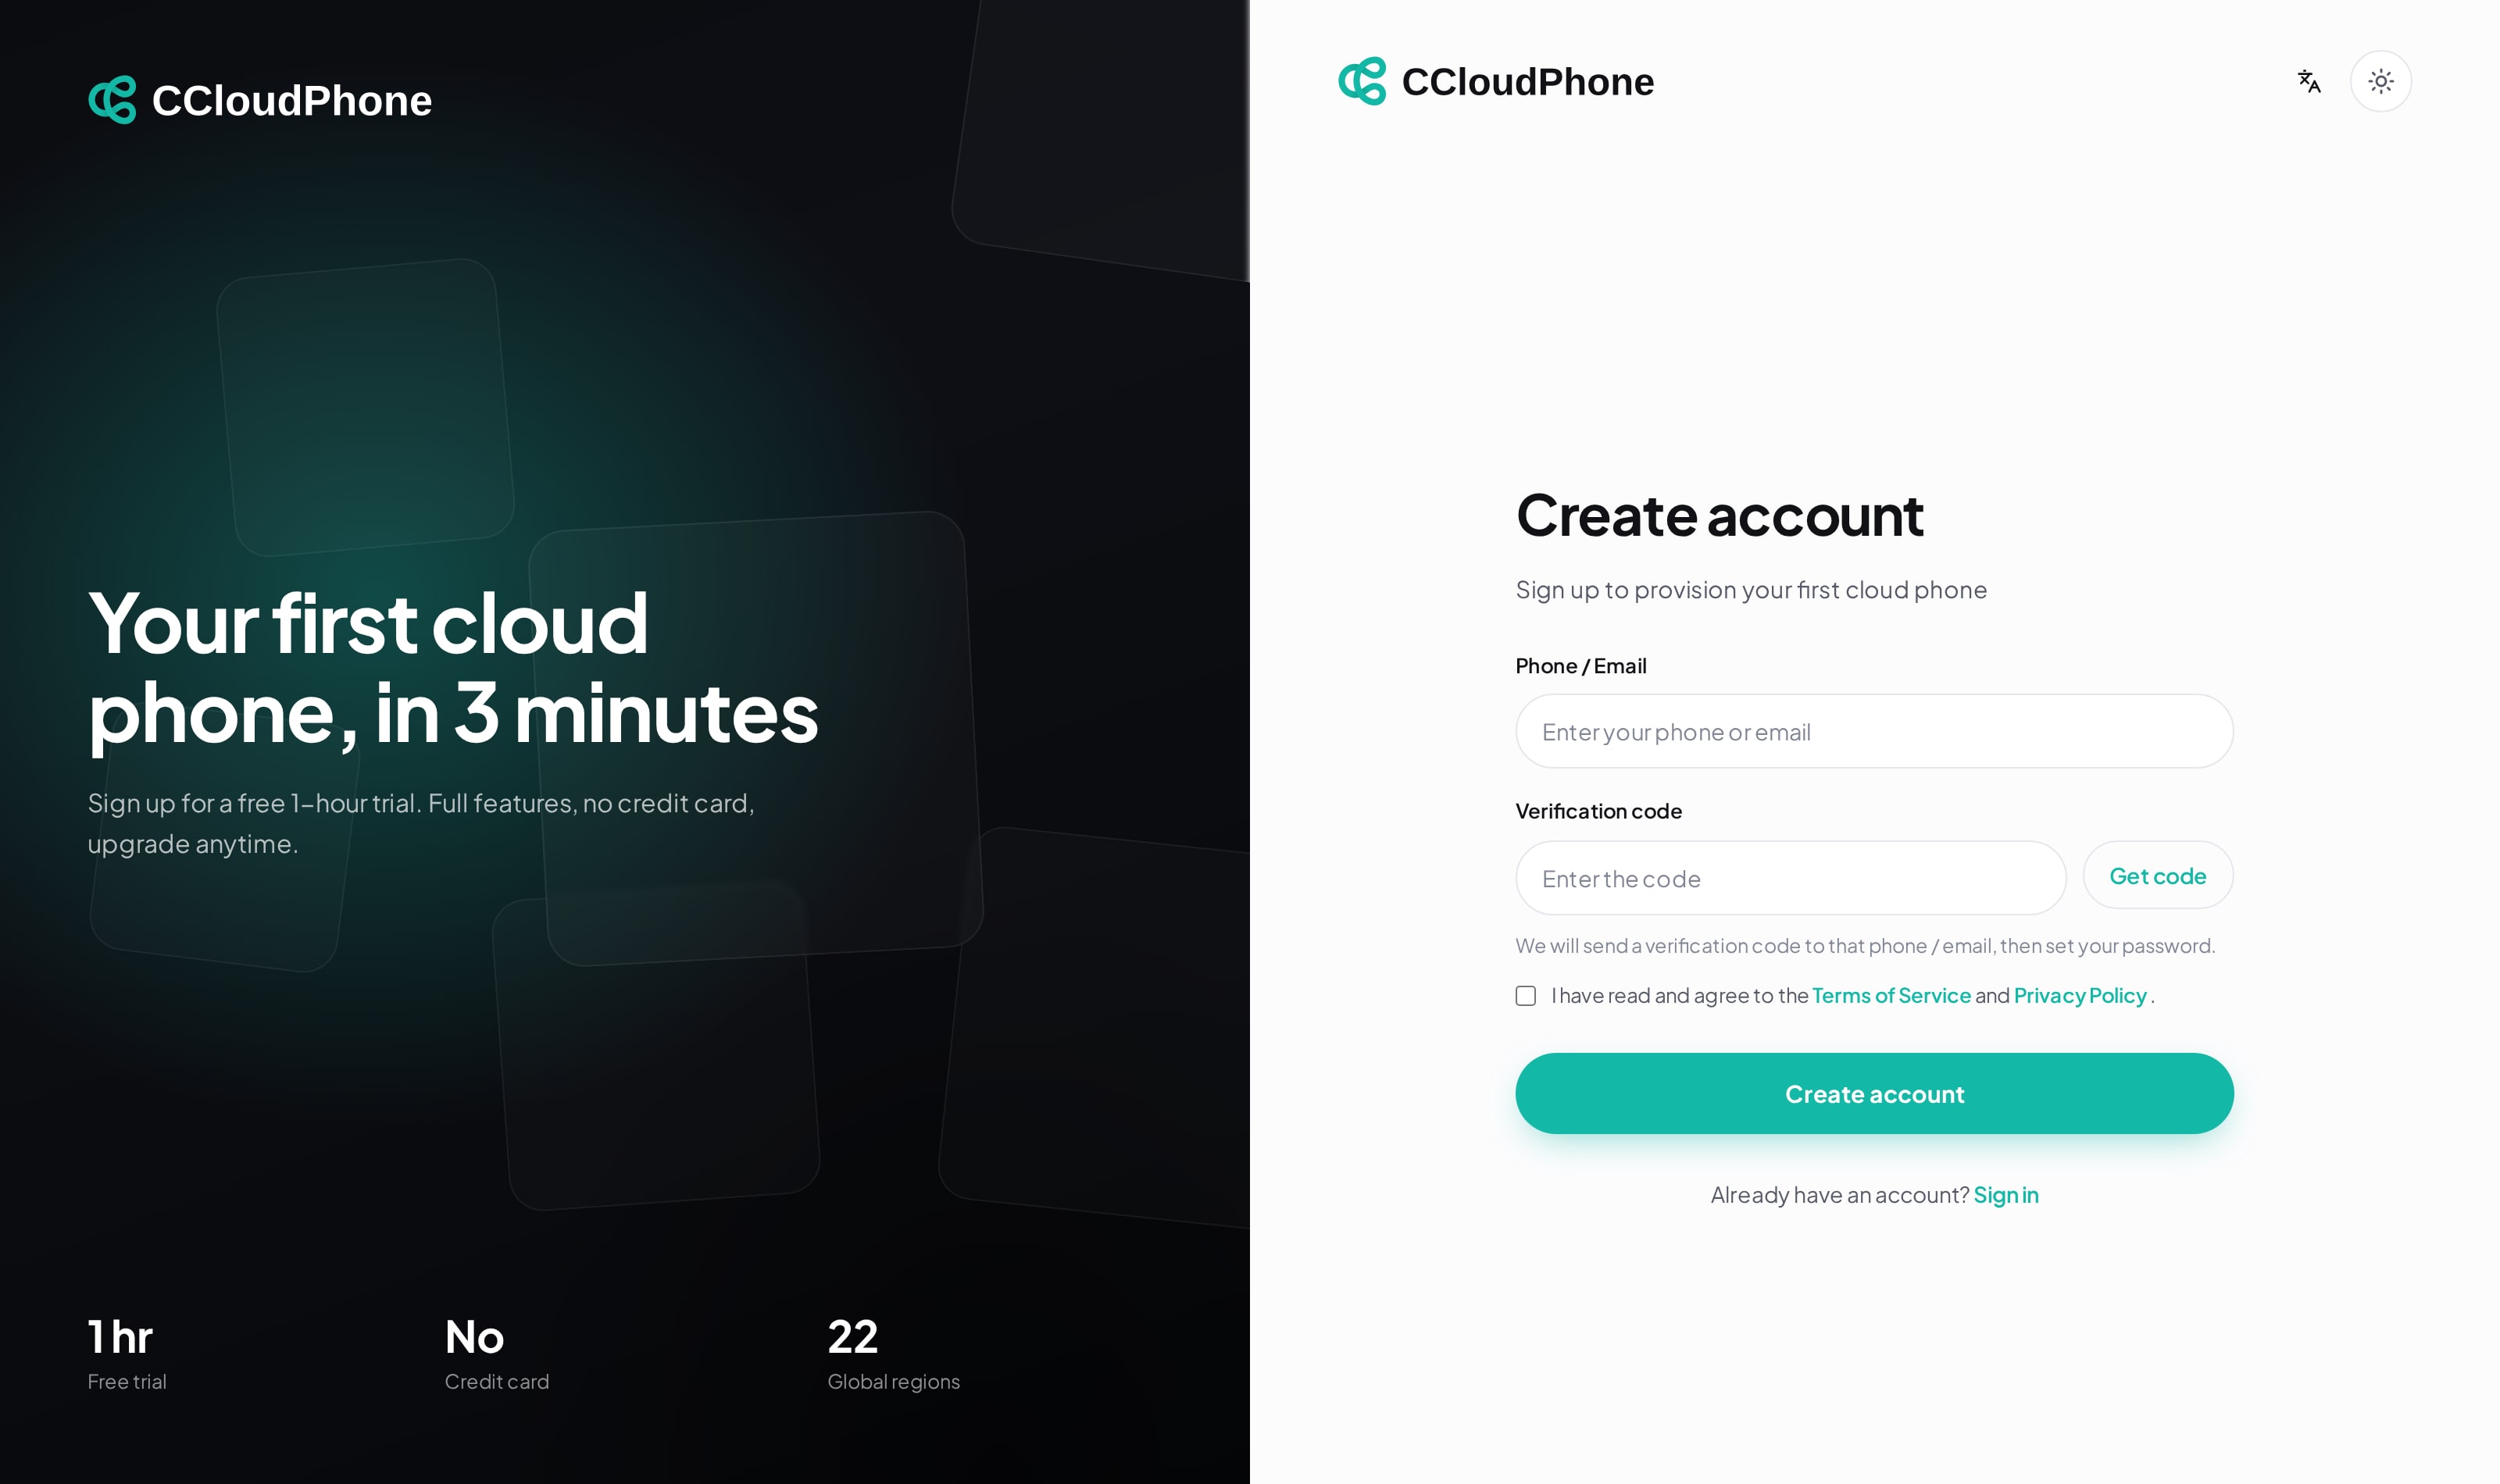
You can register with either a phone number or an email address:
- Enter your phone / email and click Get code.
- Enter the code you receive and tick the box agreeing to the Terms of Service and Privacy Policy.
- Click Create account, then set your password (8–64 characters, containing both letters and digits). You are signed in automatically once it is set.
If you already have a GloryCloud account you can use Sign in with GloryCloud on the sign-in page instead.
After signing up, check Billing → Benefits for anything you can claim. When a campaign is running, clicking the claim button credits the resources straight to your account.
2. Have an instance seat
Instance seats decide how many cloud phones you may create — available seats equal maximum instances. With no free seat, creating is refused:
实例席位不足,请先购买实例席位 (Not enough instance seats — buy more first.)
Go to Billing → Purchase. The four cards at the top are everything you can buy; the first is Instance Seats, shown as in use / total:

Click Buy on the seats card, choose a quantity and a duration in the drawer that slides out, pick a payment method and confirm. Larger quantities and longer terms get better discounts, and both new purchases and renewals come with a bundle of runtime minutes.
This step only tops up your quota — no phone exists yet. If you already have a free seat, skip to step 4.
3. Have a SOCKS5 proxy
A cloud phone cannot power on without a bound proxy, so get one ready before creating the phone.
Go to Cloud Phones → Proxy Management and click New Proxy. Fill in the host and port from your provider, plus a username and password if it needs authentication — the protocol is fixed to socks5 and cannot be changed. After saving, connectivity is checked in the background: the Status column shows OK / Failed / Untested, and the egress IP and region are filled in for you. With many proxies, use Bulk Import and paste one per line.
Two things worth remembering:
- Use one dedicated proxy IP per cloud phone; don't bind one IP to several phones.
- The check result is advisory. A proxy showing Failed can still be bound, but the phone will very likely fail to connect on boot — fix it first.
Full proxy configuration, swapping and troubleshooting: Binding and changing a proxy.
4. Create the phone
Go to Cloud Phones → My Phones and click New Phone at the top left:
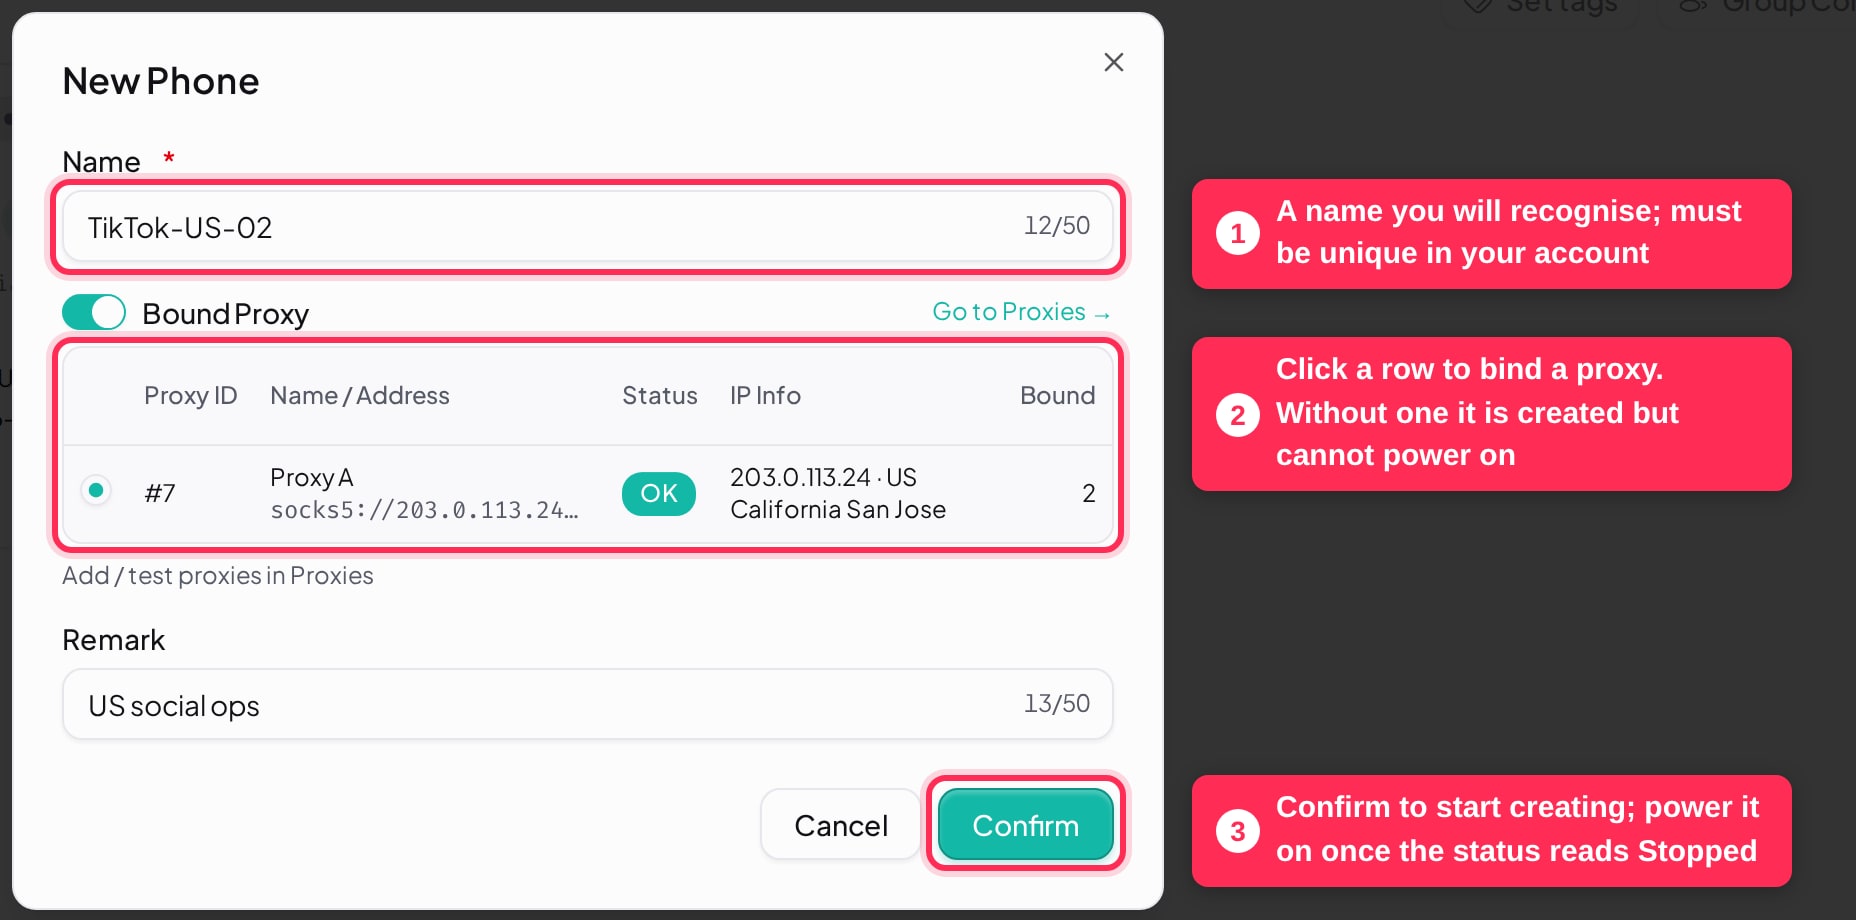
| Field | How to fill it |
|---|---|
| Name (required) | Up to 50 characters. Must be unique within your account — instances in the recycle bin still hold their names |
| Bound Proxy | On by default. Click a row in the table to pick a proxy. You can turn it off and still create the phone, but it will not power on |
| Remark | Optional, up to 50 characters. Useful for noting what the phone is for, e.g. "US social ops" |
The proxy table shows each proxy's status, egress IP and region, and how many phones already use it — handy for avoiding an IP you have used before. If your account has no proxies yet you will see "You have no proxies yet" with a Go to Proxies link.
Click Confirm to start creating. The list shows Creating first and switches to Stopped shortly after — that means it is built and simply not powered on.
5. Power it on
Find the new phone in the list and click Power On:
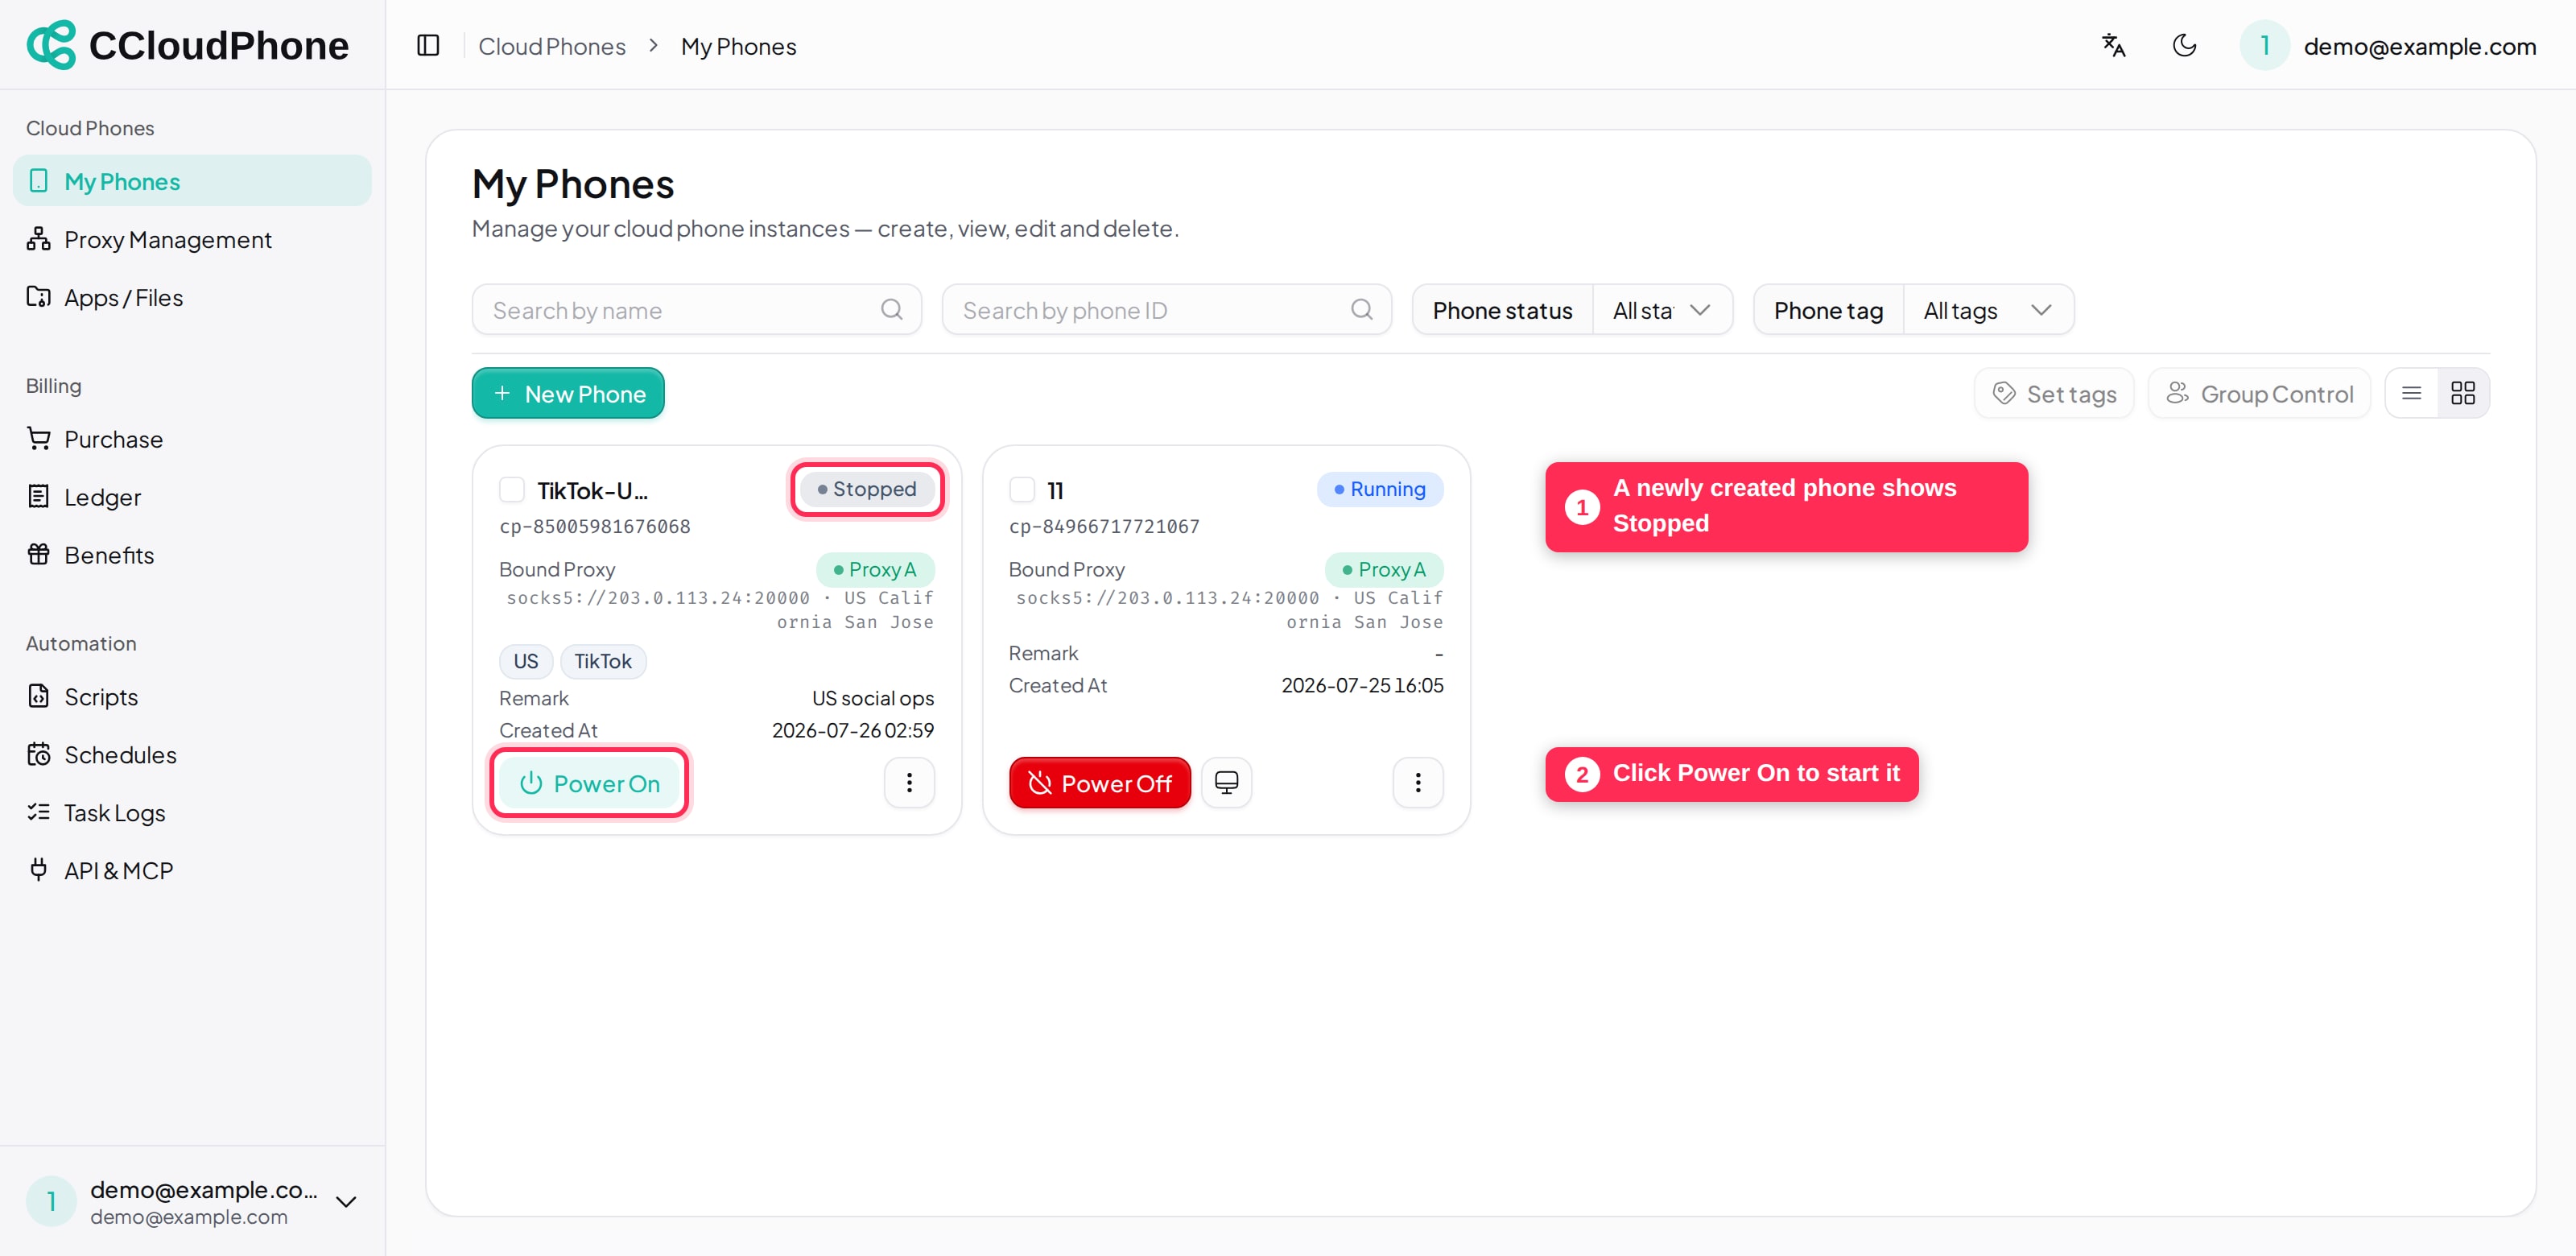
The status goes Starting → Running. Once it reads Running, a Remote Control action appears; click it to see and operate the Android device in your browser, with nothing to install.
The phone keeps running in the cloud — closing the browser window does not stop it. Remember to Power Off when you are done so the boot quota is released.
6. If creating or powering on fails
Server-side business messages are still Chinese even with the interface in English; the exact text is quoted so you can match it.
| Message | What it means | What to do |
|---|---|---|
| 实例席位不足,请先购买实例席位 | Out of instance seats | Buy more seats in Billing → Purchase, or destroy an instance you no longer need |
| 云手机名称已存在(回收站内的实例也会占用名称) | Duplicate name in your account | Pick another name; recycled instances still hold theirs |
| Please select a proxy to bind | The Bound Proxy switch is on but no row is selected | Click a row, or turn the switch off and bind later |
| 未绑定代理,无法开机,请先绑定代理 | This phone has no proxy | Edit the phone, bind a proxy, then power on |
| 没有可用的包月开机名额或临时开机时长,无法开机,请购买包月开机数或临时时长 | Neither kind of boot quota is available | Buy monthly boot slots or runtime minutes |
| 包月开机名额已被正在运行的云手机占满,且临时开机时长已用完。请先关闭一台,或购买临时时长/更多包月开机数 | You own slots, but running phones hold them all | Power one phone off to free a slot, or buy more |
| The selected proxy failed its latest check — you can still bind it, but the phone may fail to connect on boot | The proxy's last probe did not succeed | Run Test in Proxy Management and fix it before powering on |
7. Next
- How billing works, and choosing between boot slots and runtime minutes: How CCloudPhone charges
- Binding and swapping proxies: Binding and changing a proxy
- Operating the phone in your browser: Controlling one phone
Last updated: Jul 26, 2026