How to Install Apps on a Cloud Phone: APK Upload, Permission Confirmation, and Handling Failures
Installing apps on a cloud phone is genuinely different
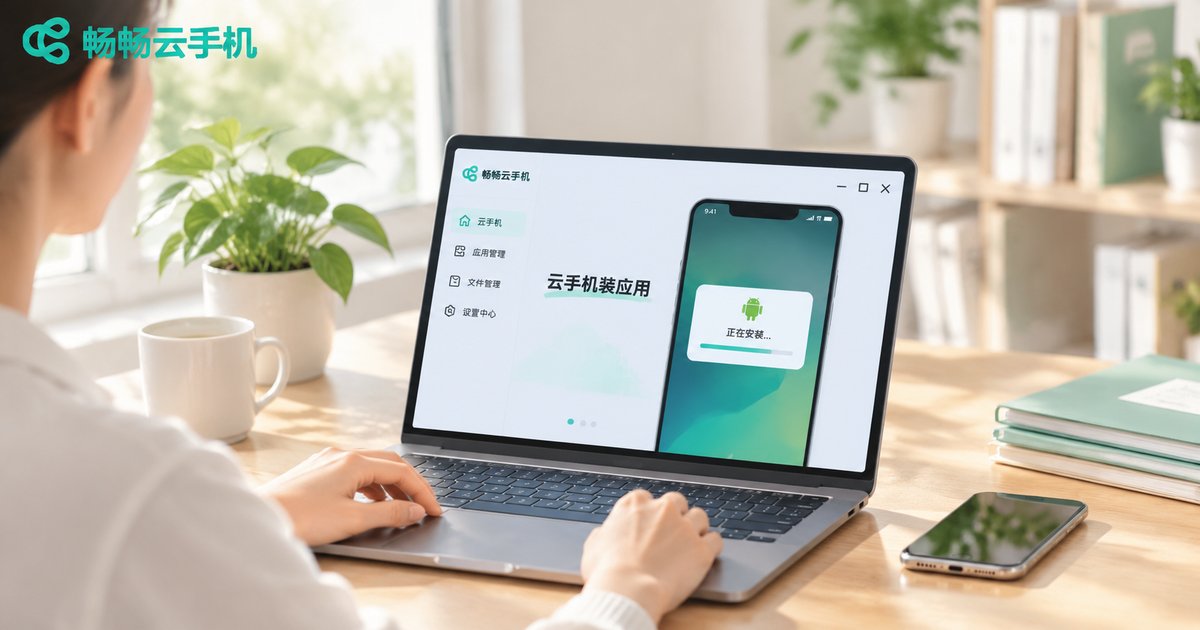
A cloud phone is an Android device running in the cloud, and what you see is a live video stream sent back to your local screen. The operating system, the apps and the data all live on a server, so installing an app adds two steps you never think about on a real phone: the APK has to be delivered into the cloud phone first, and permissions must be confirmed on that cloud device.
Once you keep those two differences in mind, the rest of the process is basically the same as on any Android handset. Here is the whole flow, in the order you will actually do it: choose a method, upload the package, grant permissions, then troubleshoot.
Three ways to install, pick the one that fits
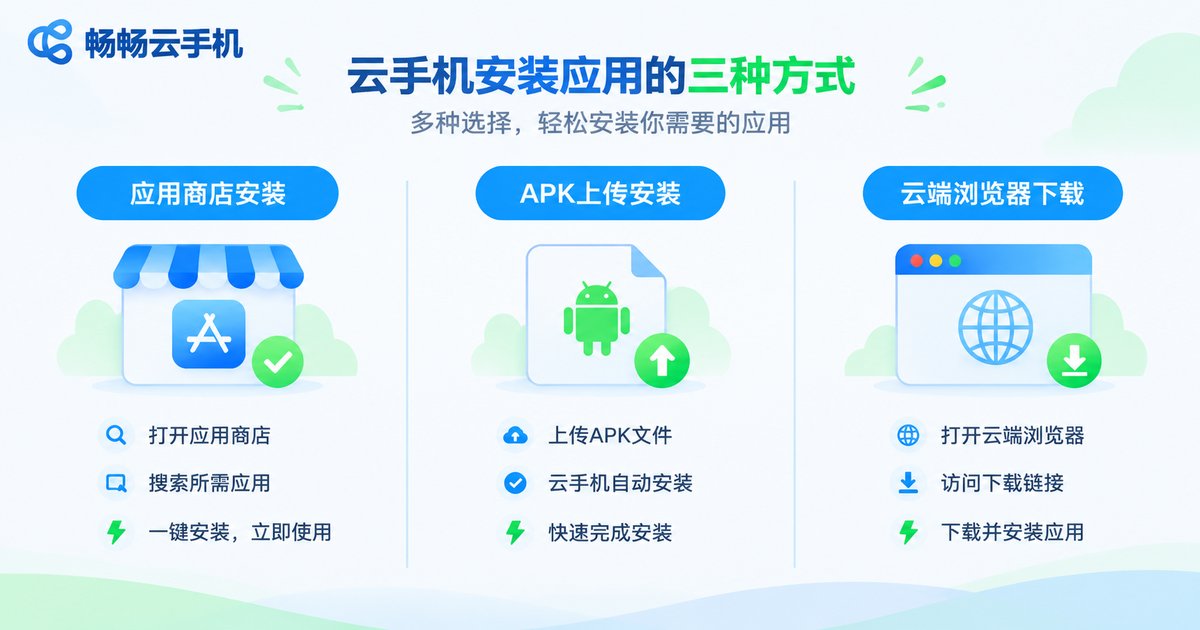
There are three common routes, and their trade-offs are quite different. The table below makes it clear:
| Method | Best for | Watch out for |
|---|---|---|
| In-cloud app store | Popular, mainstream apps | The easiest path, but anything not listed in the store simply cannot be installed this way |
| Download locally, then upload the APK | Apps missing from the store, internal test builds, specific versions | You need the APK file locally first, then upload it through the console |
| Download inside the cloud browser | Small packages | Consumes cloud storage and bandwidth; large files often drop halfway |
If you need a specific version, an internal test build, or a rollout to several devices, uploading the APK is the only dependable route — and that is what the following steps focus on.
Step 1: Get the package into the cloud phone
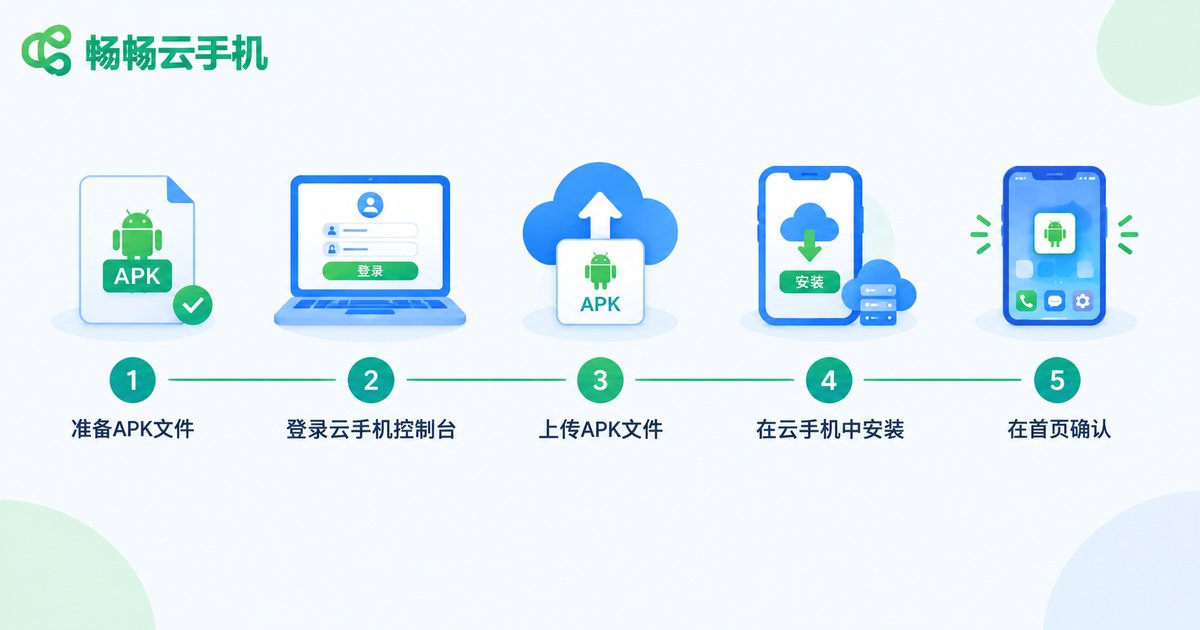
The whole thing boils down to five steps, and once you are used to it, it takes a minute or two:
1. Prepare the APK locally. Download it on your computer or a physical phone, and check that the extension is .apk and the file size looks normal. An “APK” that is only a few hundred kilobytes is almost always a failed download.
2. Sign in to the ccloudphone console. Open the detail page of the cloud device you want to work on. You will usually find an entry such as file upload, app upload or package management.
3. Upload the APK. Click upload and select the file you prepared. Bigger files take longer; if the progress bar seems stuck, do not keep clicking, or you will create duplicate tasks.
4. Complete the install inside the cloud phone. Some consoles start the installation automatically once the upload finishes. If yours does not, open the file manager inside the cloud phone, locate the uploaded file and tap install.
5. Verify on the home screen. Make sure the icon appears, then open the app once. It is only really installed when it reaches its home page normally.
One tip worth remembering: rename the file using plain letters or numbers before uploading. Chinese characters, spaces and special symbols occasionally cause recognition issues on certain cloud images.
Step 2: Confirm permissions — do not skip these
The most common roadblock is installing from unknown sources. The first time you install an uploaded APK, the system asks whether to allow apps from that source. You must tap allow, otherwise the installation will be blocked every time.
Beyond that switch, these permissions are worth confirming as well:
Storage / file access: without it, the app cannot read local data, and importing assets or saving screenshots will fail.
Display over other apps: required by floating buttons, screen recorders and overlay windows. Without it those features fail silently.
Background running and autostart: if you want an app to stay alive in the cloud phone, set it to unrestricted in battery optimisation.
Notifications: essential for messaging and customer-service apps. Without it you only see the screen and receive no alerts.
Network access: most apps have it by default, but internal enterprise apps may need extra network whitelisting. If an app installs but will not open, check this first.
Step 3: When installation fails, check in this order
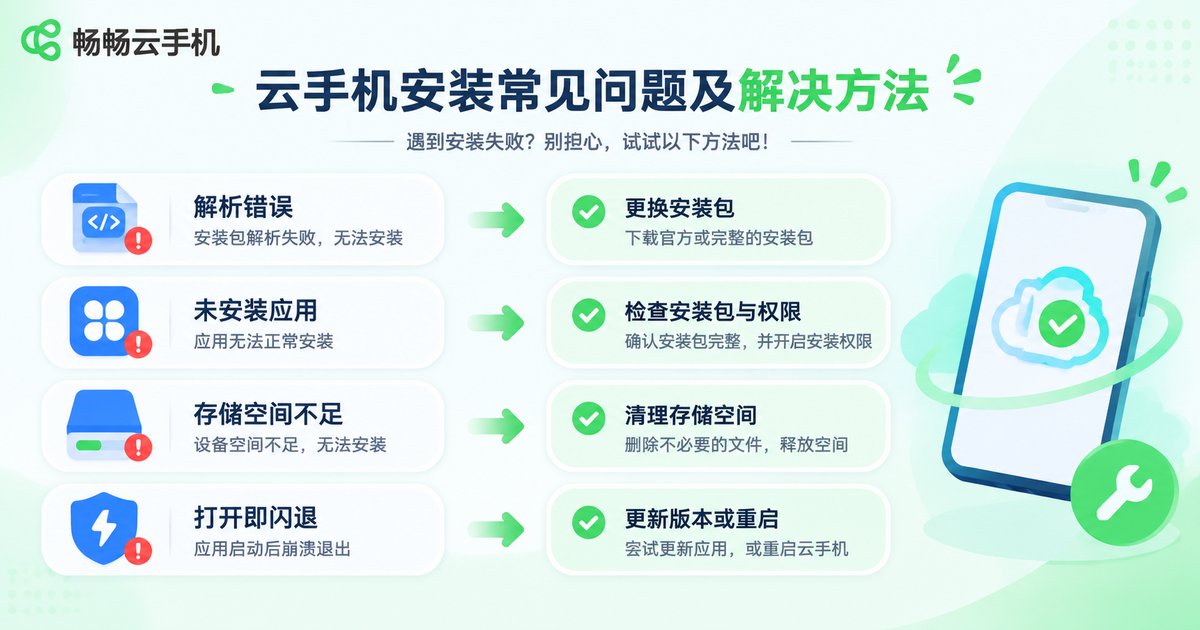
Failures are not the problem — not knowing where to look is. The table below covers the vast majority of cases; match the symptom and follow the fix:
| Symptom | Likely cause | Fix |
|---|---|---|
| “Parse error” | Incomplete download, or an APK that does not match the device architecture | Download a complete package again and confirm it suits that Android version |
| “App not installed” | Package name or signature conflict with an existing app | Uninstall the old version and retry, or use a build with a different package name |
| “Not enough storage” | Cloud storage filled with old APKs and cache | Clear the cache, delete old packages and retry |
| Nothing happens, long white screen | Instance resource pressure, or the app requires a newer Android version | Restart the cloud phone, or move to a higher-spec, newer-system instance |
| Installs but crashes on open | Missing dependencies or key permissions not granted | Grant permissions one by one, then uninstall and reinstall |
| Upload stuck at 0% | Unstable local network, or the file is too large | Switch networks, or compress and split the file before uploading |
Habits that make installs smoother
Consistent naming: name packages as app-name plus version, so you never pick the wrong file when there are dozens of them.
Test as you go: open each app right after installing it, so you immediately know which package caused a problem.
Keep the previous version: store the last working APK in the cloud so you can roll back quickly if a new build misbehaves.
Validate on one device, then scale: when deploying to multiple cloud phones, get it working on one first, then copy. It saves a lot of repeated debugging.
Why ccloudphone makes app installation easier
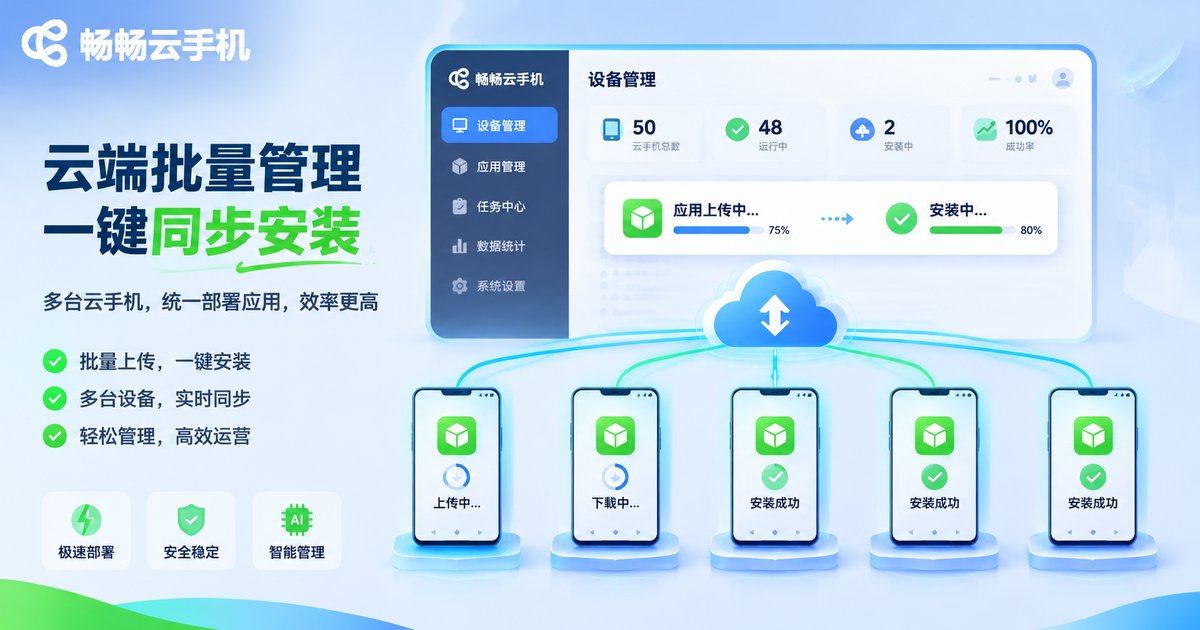
ccloudphone provides a cloud Android environment where APK upload and app management happen directly in the console, so you never shuttle files between your local phone and the cloud. For people who install apps often, the benefits come down to three things:
One place to upload: upload the package once in the console and finish the installation inside the cloud phone — no screenshots, no QR codes, no third-party relay tools.
Multi-device management: when you maintain several cloud phones, app deployment and permission settings all happen in the same interface, which is far cheaper than touching each device individually.
Always-on in the cloud: apps keep running in the cloud, so your local phone never has to stay awake. Heat, battery drain and memory pressure all stay on the server side.
FAQ
Q: Is there a size limit for uploaded APKs?
Keep a single APK within a reasonable size; very large game packages are better downloaded inside the cloud phone. The exact limit is shown in the console.
Q: Can I install apps that depend on GMS services?
It depends on whether the cloud image you choose includes the relevant framework. Check the image list when creating the instance — choosing one with the framework makes life much easier.
Q: The install fails but the system shows no message at all. What now?
Restart the cloud phone and try again. If it still fails, verify in the file manager that the APK is complete, or test the same file on another cloud phone to see whether the package or the instance is at fault.
Q: How many apps can one cloud phone hold?
Mostly it is limited by cloud storage and RAM, and by how large the apps are. The more you install, the tighter the memory gets, so avoid filling a device that needs to run apps around the clock.
Q: Does installing apps on a cloud phone use my local data?
It uses data for streaming the screen, but the app itself runs in the cloud. Compute and heat stay on the server, so the burden on your local phone is much smaller.
Q: Do installed apps disappear after the cloud phone restarts?
Properly installed apps stay on the cloud instance and survive a restart. They are only removed when you clear data or reset the instance, so back up anything important before a reset.