Cloud Phone Script Click Offset: Fixing Resolution, Scaling and Coordinate Mismatches
The real cause: two different coordinate systems
Running automation inside a cloud phone often produces a familiar surprise: a script that clicks perfectly on a local device starts hitting the wrong spot in the cloud. Sometimes it drifts a few dozen pixels high, sometimes it lands on a completely different button. In most cases the script logic is fine — the coordinates stored in the script and the screen coordinates the cloud phone actually renders live in different reference frames.
The script works with numbers; the screen works with pixels. Any change in resolution, aspect ratio, DPI density or status bar height between those two ends will shift the tap. The good news is that these offsets are almost always fixable with a fixed conversion formula — no rewrite required.
Cause 1: Resolution mismatch
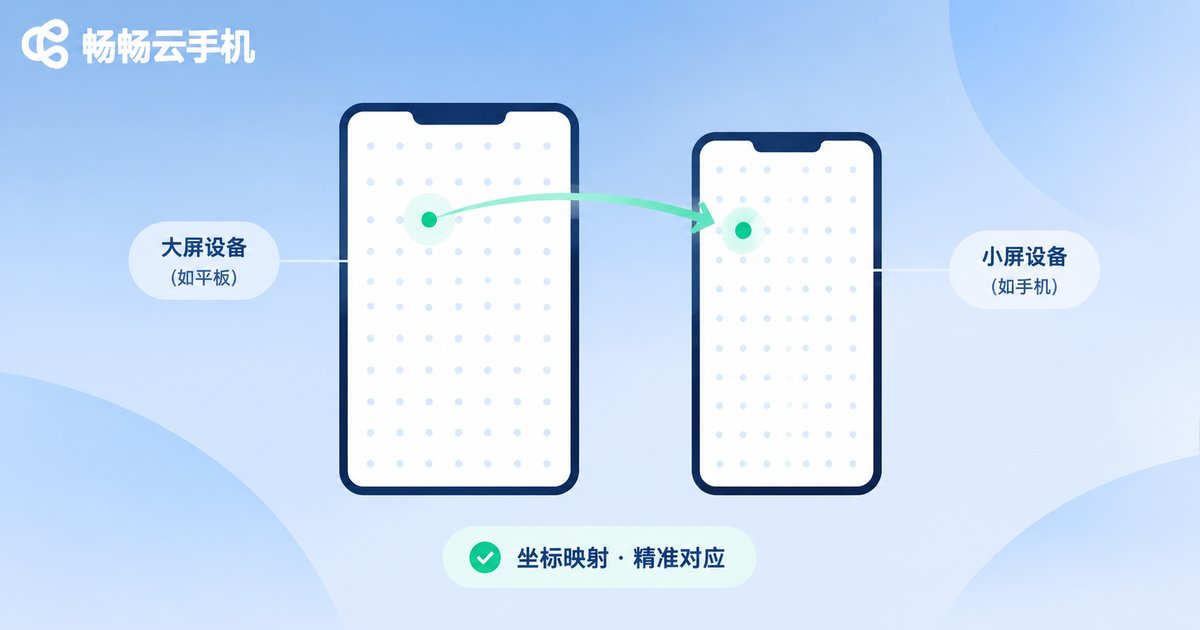
Scripts are usually recorded against a design resolution, for example 1080×1920. If the cloud phone instance actually runs at 720×1280, a tap originally placed at (540, 960) should become (360, 640). Reusing the old coordinates pushes every click toward the top-left corner.
The conversion is a simple proportional scale:
actualX = designX × actualWidth ÷ designWidth
actualY = designY × actualHeight ÷ designHeight
For example, with design coordinates (540, 960), design resolution 1080×1920 and actual resolution 720×1280:
actualX = 540 × 720 ÷ 1080 = 360
actualY = 960 × 1280 ÷ 1920 = 640
Recommendation: lock the instance resolution to the script design resolution in the cloud phone console. That removes this category of offset at the source and prevents it from stacking with the other causes below.
Cause 2: Aspect ratio and letterboxing
More subtle than a resolution mismatch is an aspect ratio mismatch. If the script was designed on a 16:9 screen but the instance runs at 20:9, the frame is usually scaled proportionally and centered, leaving black bars on the sides or top and bottom. Scaling only by width then introduces a systematic vertical offset — it looks like the script drifts slightly downward.
Fix it by computing the scale factor and the padding before converting:
scale = min(actualWidth ÷ designWidth, actualHeight ÷ designHeight)
offsetX = (actualWidth - designWidth × scale) ÷ 2
offsetY = (actualHeight - designHeight × scale) ÷ 2
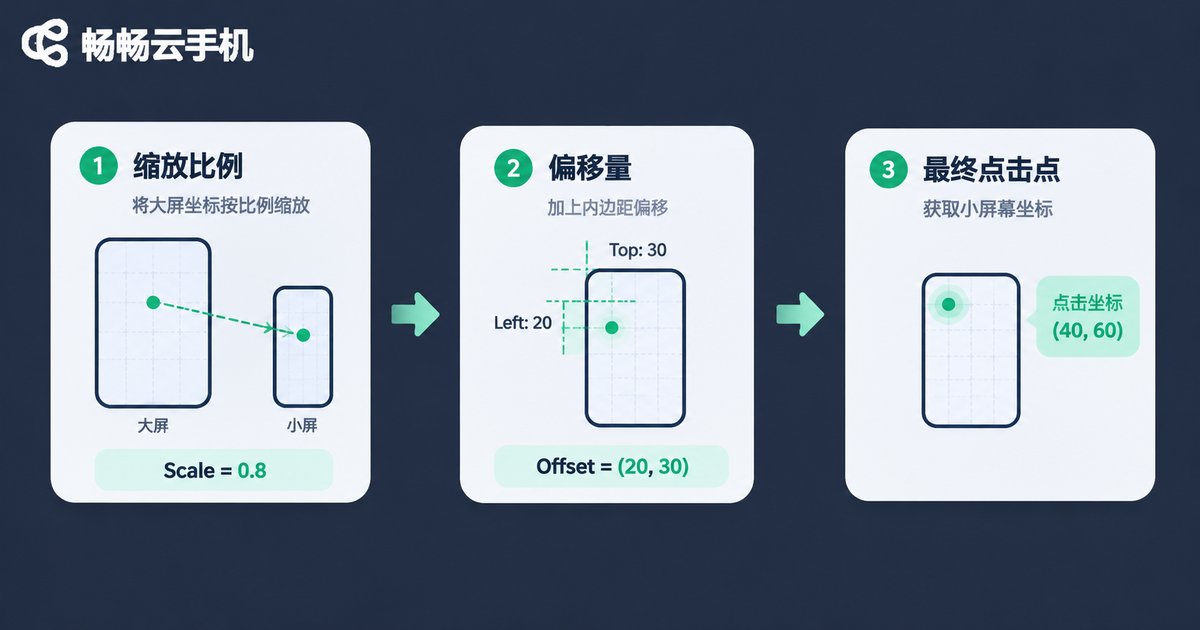
finalX = designX × scale + offsetX
finalY = designY × scale + offsetY
Wrap this in a single helper and route every tap through it. Letterboxing offsets disappear once, and new instances no longer require editing each coordinate by hand.
Cause 3: Display scaling and DPI density
Some automation frameworks — accessibility-based ones in particular — work in dp rather than px. The bridge between them is DPI density:
px = dp × (DPI ÷ 160)Physical phones commonly run at 320 or 480 DPI, while a cloud phone instance may be configured at 240 or 420. Once DPI changes, the same dp value maps to different pixels and every tap drifts — and the drift grows the closer a tap is to the screen edge.
Display size and font size scaling in system settings also affect accessibility node coordinates. Reset those to the default 100 percent first, then re-enable them one by one; it is the fastest way to isolate the culprit.
Cause 4: Status bar and navigation bar origin
Coordinates obtained from screenshot analysis usually use the top-left corner of the cropped image as their origin, while tap APIs typically use the top-left corner of the entire screen. The difference is the status bar height. If a virtual navigation bar exists at the bottom, the usable height shrinks as well. The typical symptom: horizontal taps are correct while vertical taps are consistently off by ten to several dozen pixels.
There are two fixes: record the crop region offset Y when taking the screenshot and add it before tapping, or read the center point of the bounds provided by the accessibility node and skip manual conversion entirely. The second option is generally more stable.
Comparing coordinate strategies
Instead of patching offsets repeatedly, pick the right strategy from the start. Here is how common approaches behave inside a cloud phone:
| Strategy | Handles resolution changes | Handles aspect ratio changes | Maintenance cost | Best for |
|---|---|---|---|---|
| Absolute pixel coordinates | Poor | Poor | Low | Single instance with a locked resolution |
| Relative (percentage) coordinates | Good | Fair | Medium | Batch runs across resolutions |
| OCR or image matching | Good | Good | High | UIs that change often or move buttons |
| Accessibility node bounds | Good | Good | Medium | Scenarios with readable native controls |
In practice the most reliable combination is relative coordinates with accessibility node fallback: everyday taps use percentages, and when recognition fails the script falls back to node bounds. You keep the speed without letting a single bad coordinate stall the whole task.
A repeatable troubleshooting flow
When taps drift, run through this order — you will usually identify the cause within ten minutes:
1. Print the instance resolution, aspect ratio and DPI, then compare each against the script design parameters.
2. Tap the four corners and the center once each, and map the drift direction to tell proportional scaling apart from a fixed offset.
3. Temporarily set the instance to the design resolution and rerun. If the offset disappears, the problem is resolution-related.
4. Check whether display size or font size scaling has been changed, and restore defaults.
5. Confirm that the screenshot crop origin matches the tap API origin, and add the status bar height if needed.

Why the right cloud phone saves hours of debugging
Half of the work behind click offsets is really about aligning environments. When instance resolution, DPI and aspect ratio can be defined once and kept stable, a script only needs to be calibrated a single time. Ccloudphone (ccloudphone) offers configurable resolution and DPI settings, and instance settings stay consistent across restarts and relaunches, with unified specs across multi-instance setups — which matters a great deal for automation that must run reliably for long periods.
Once instance parameters are unified, the same coordinate configuration can be copied to every instance. There is no per-device calibration and no more hard-to-reproduce issues where a script works on one instance but drifts on another.
Frequently asked questions
Q: If the cloud phone resolution differs from the design resolution, do I have to rewrite the script?
Not necessarily. Convert coordinates with the proportional formula first. You only need to add letterbox padding when the aspect ratio also differs.
Q: Why are horizontal taps accurate while vertical taps are always off?
That is a classic status bar or navigation bar origin difference, and it can also come from letterboxing caused by an aspect ratio mismatch. First check whether the screenshot region includes the status bar, then verify the instance aspect ratio.
Q: Will the coordinates change again after the cloud phone restarts?
As long as resolution and DPI are fixed for the instance, screen parameters do not change on restart and the coordinates stay consistent. Decide the parameters at deployment time and avoid changing them mid-run.
Q: Should the script use absolute or relative coordinates?
For a single instance at a locked resolution, absolute coordinates are the simplest. When running across instances and resolutions, relative coordinates are clearly more stable.
Q: Why do taps drift after only changing DPI?
Because dp-based frameworks convert dp to px before tapping, and the conversion changes with DPI. Restoring DPI to the value used when the script was recorded usually makes the offset disappear immediately.